RGB lighting is incredibly fun, creative, and versatile. Whether you want to add a touch of ambiance to your home, office, shop, or restaurant, RGB LED tape can transform any space into something truly remarkable. Setting up RGB LED tape may seem intimidating at first, but don't worry! It's actually quite simple and can be done in just a few easy steps. In this article, we'll guide you through the process of syncing your own RGB LED tape to a remote control.
Read more: What type of batteries do battery-operated LED lights use?

Step 1: Gather the Necessary Components
Before you begin, make sure you have all the required components. These include:
Read more: How to Install LED Strip Lights for TV
- RGB LED tape
- An RGB remote control
- A receiver
- An LED driver (for help determining the appropriate driver, check out our blog)

Step 2: Connect the Receiver to the Driver
Start by plugging the receiver into the LED driver using male-to-female connectors.

Step 3: Connect the LED Tape to the Receiver
Next, plug your RGB LED tape into the receiver using a 4-way distribution block.

Step 4: Prepare the Receiver
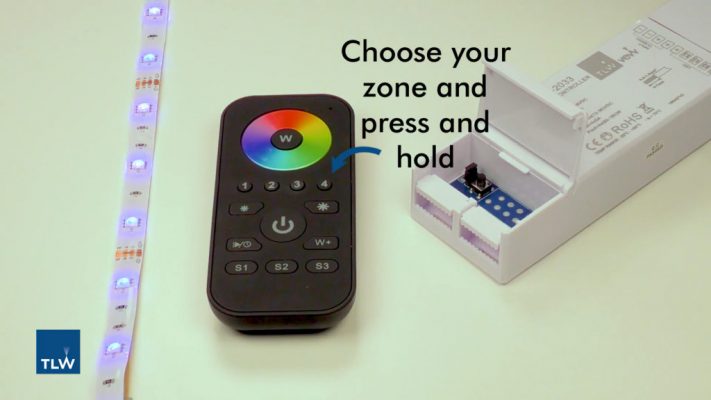
Open the hatch at the end of the receiver. If you are installing lighting into one zone, make sure both pins are covered by the jack on the master LED controller.
Read more: Converting to LED lights: everything you need to know

Step 5: Turn on the Remote Control
Switch on the RGB remote control.

Step 6: Activate the Learning Mode
Press the learning key on the receiver.

Step 7: Program the Remote Control
Press and hold the zone that you wish to set up on your remote control until the LED tape flashes. Once this happens, the zone is successfully programmed.

Using the White Colour Temperatures
Step 1:
Press the W+ button on your remote control.

Step 2:
Continue pressing the W+ button until you find the desired colour temperature. Options include warm white (3000k), natural white (4000k), and daylight (6000k).


Using Colour Sequences and Setting Up Scenes
Step 1:
Press the sequence button on your remote control.

Step 2:
Continue pressing the sequence button until you find the desired colour sequence. Once you've made your selection, leave the sequence on and choose which scene you'd like to set it to. Press and hold the number of the scene you'd like to assign it to. You can set up to three scenes. You can also set solid colours using the same process.

If you prefer a visual guide, you can watch our helpful video tutorial here.
For more information, don't hesitate to contact the TLW team at 01302 741941, visit our VEWtube channel for informative videos, or email us.
Frequently Asked Questions
Q: How do I sync a RGB colour adjustable LED tape to a remote control?
A: Follow the steps outlined in this article to easily sync your RGB LED tape to a remote control.
Q: What components do I need for syncing RGB LED tape?
A: You will need RGB LED tape, an RGB remote control, a receiver, and an LED driver.
Q: How many scenes can I set up with my remote control?
A: You can set up to three scenes using the remote control.
Q: Can I adjust the colour temperature of the LED tape?
A: Yes, you can adjust the colour temperature by pressing the W+ button on the remote control.
Q: Where can I find more information and video tutorials?
A: You can contact the TLW team, visit our VEWtube channel, or email us for more information and helpful video tutorials.
Q: Can I sync a CCT colour temperature adjustable LED tape to a remote control?
A: Yes, for instructions on how to sync a CCT colour temperature adjustable LED tape to a remote control, check out our blog.
At TLW, we strive to inspire with our lighting solutions. Let your creativity shine with RGB LED tape and transform any space into something extraordinary.